Check out this awesome recipe for homemade organic peach ring candy by our partner Jessica Kelly of The Kitchen Gardens! She showed it off in her most recent video. What an amazing idea just in time for Halloween!
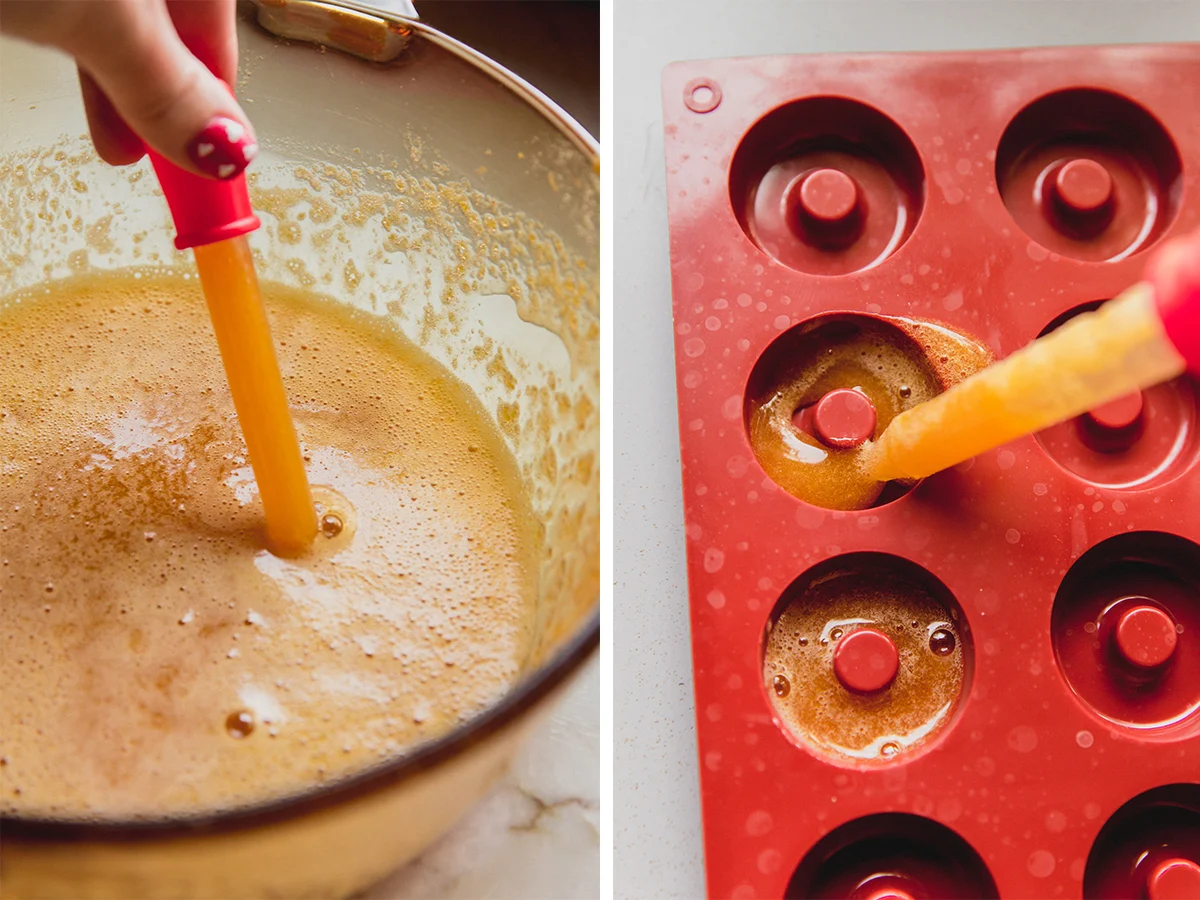
Image by Unbound Wellness.
Ingredients
180g fresh or frozen organic yellow peaches, peeled (about 2/3 cup blended)
2 envelopes (~7g each, ~ 14g total) unflavored powdered gelatin
2 tablespoons freshly squeezed organic lemon juice
2 tablespoons organic honey or agave
1 1/2 teaspoons organic tart cherry concentrate (or natural red food coloring)
Optional: 1/4 cup organic sugar + 1 tbsp (or less) lemon powder for coating
Instructions
1. Purée the fruit
Place your fruit in a blender and process it until the mixture is silky smooth. Note: it is not required to peel your fruit but l’ve found it has a purer peach flavor using peeled peaches. If you prefer a more delicate texture, you can press the purée through a fine mesh strainer to remove bits of skin—but this step is entirely optional.
2. Bloom the gelatin
Sprinkle the gelatin evenly over the lemon juice in a small dish. Stir well until all the powder is moistened and no dry granules remain. Set the mixture aside for about 5 minutes to allow the gelatin to fully absorb the liquid.
3. Warm the fruit purée
While the gelatin blooms, pour the fruit purée into a small saucepan along with the honey or agave.
Warm it gently over low heat, stirring constantly. Your goal is to heat the mixture just enough to dissolve the gelatin (around 120°F), not to bring it to a boil-too much heat can break down the gelatin.
4. Mix in the gelatin
Add the bloomed gelatin and lemon juice mixture into the warm fruit purée. Stir until the gelatin is fully melted and the mixture is smooth. Take the pan off the heat and let it cool slightly-about 5 minutes.
5. Fill your molds
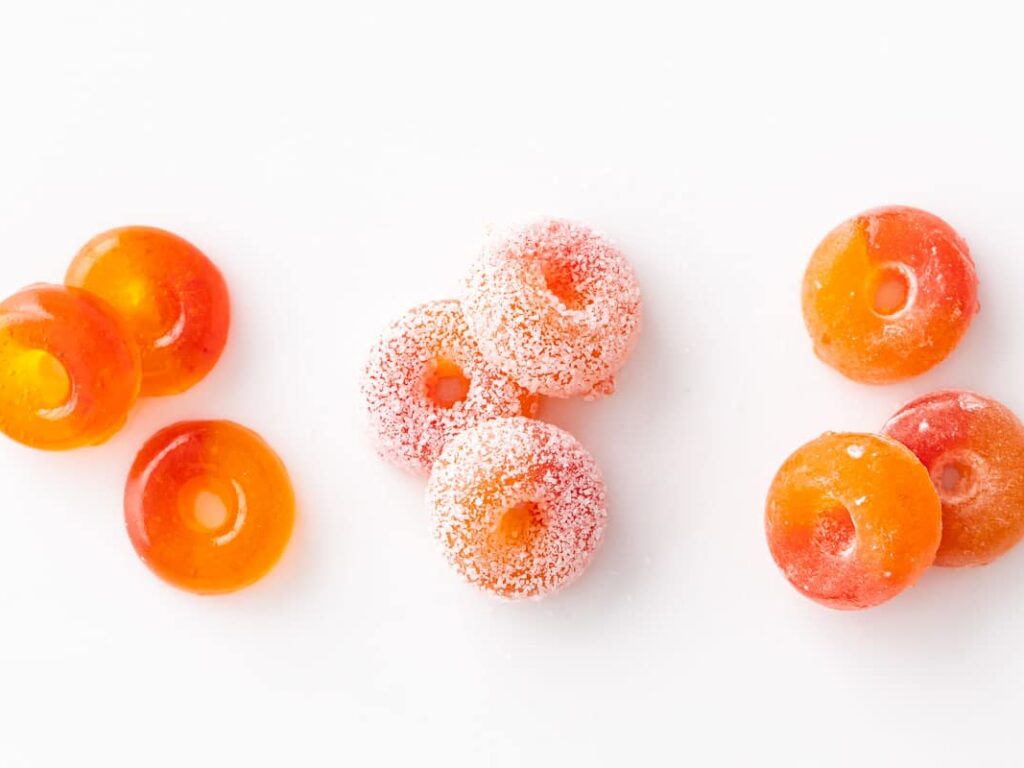
Divide the mixture evenly between two bowls. Stir the tart cherry concentrate into one bowl to create a second color. Lightly mist your silicone molds with avocado oil or cooking spray to make unmolding easier. Using two spoons or droppers, fill each mold with both colors side by side for a fun layered look.
Transfer the molds to the fridge and let them chill for about 1½ hours, or until firm.
6. Dry the gummies
Once set, gently remove the gummies from their molds and place them on a wire rack. Let them air dry for 8 hours or overnight. As they dry, they’ll shrink slightly, concentrate in flavor, and develop that perfect chewy gummy texture.
7. Optional finishing touch
If you’d like a sweet-tart coating, roll the gummies in a sugar and citric acid mixture right before enjoying them. Important: this coating draws out moisture, so don’t coat them ahead of time or they’ll soften and eventually melt. Instead, store the coating in a small container and coat only the gummies you plan to eat immediately.